Gorgias is the system currently being used by our company to keep track of phone calls, text messages, online chat messages, and some emails through the Gorgias ticketing system. Here is a guide on using various features on the system:
- 1. What is Gorgias?
- 2. Tickets
- 3. Logging into Gorgias
- 4. Gorgias Menu
- 5. Ticket Status
- 6. Assigning Tickets
- 7. Changing Ticket Titles
- 8. Adding Notes
- 9. Merging Tickets
- 10. Editing Customer Profiles
- 11. Adding New Customers
- 12. Merging Customers
- 13. Sending Texts
- 14. Sending Emails
- 15. Sending eBay Messages
- 16. Snoozing Tickets
- 17. Gorgias-IntelliDealer Integration
- 18. Training Demo
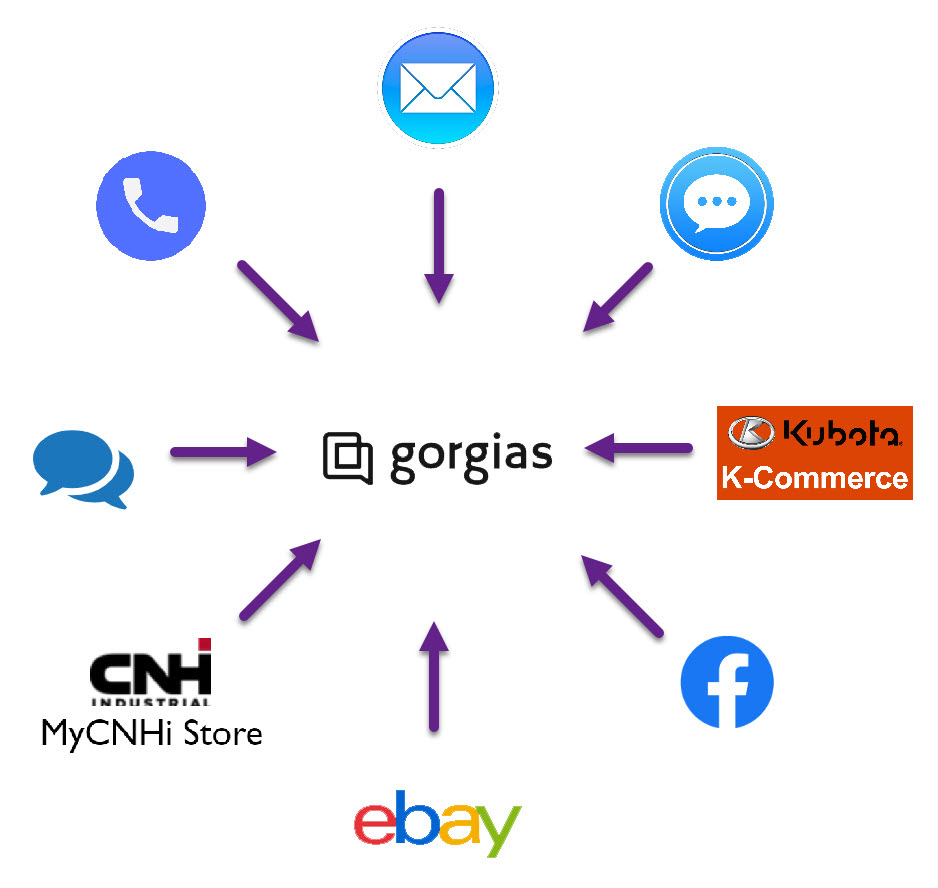
Gorgias is a central customer communication hub, which allows a company such as ours to manage incoming customer inquiries through different "channels" such as phone calls, text messages, website chats, etc. Here is what that looks like visually for us:
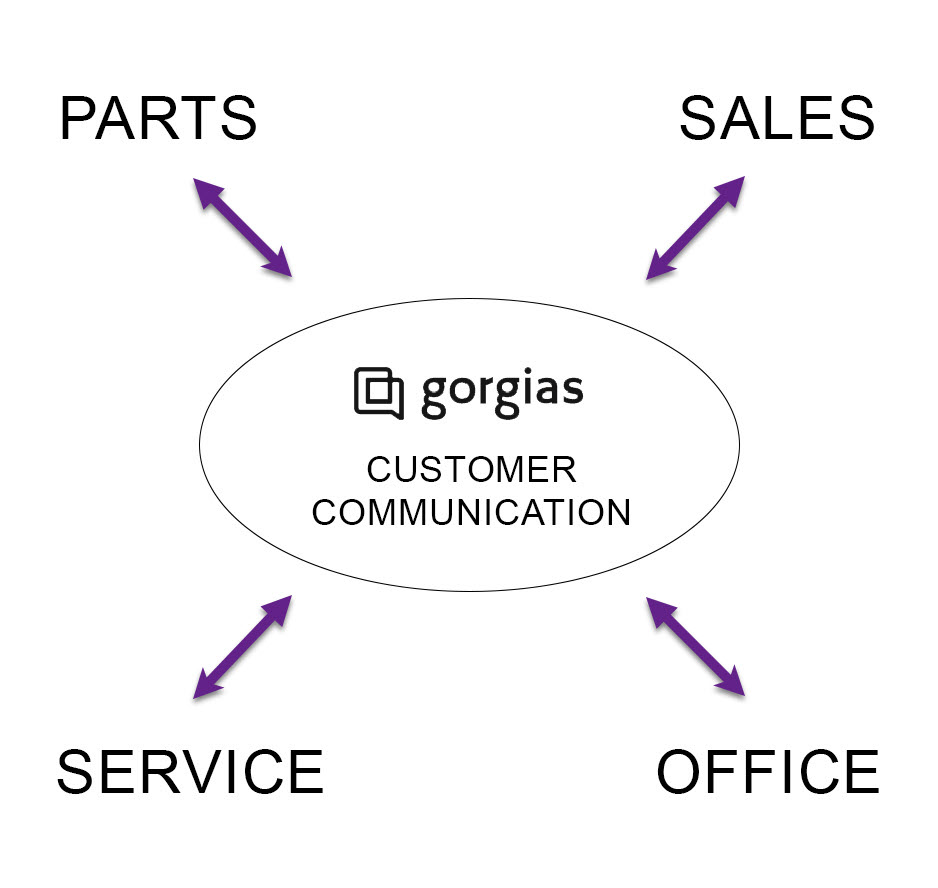
By using a central communication hub such as Gorgias, it allows all of the staff to communicate and keep notes of conversations with customers in a collaborative manner. You will see the benefits of this as you learn how to use it, but from a high-level perspective, you can think of Gorgias as one big shared notebook for keeping customer notes on across the company, which allows everyone to work on customer inquiries in a more coherent way than if you were to just keep track of your own conversations and notes individually. Here is what that looks like visually:
The rest of these sections in this training page will walk through how Gorgias works so you can learn how to use it in an effective manner to keep track of your tasks with customers quicker and easier for yourself and everyone else.
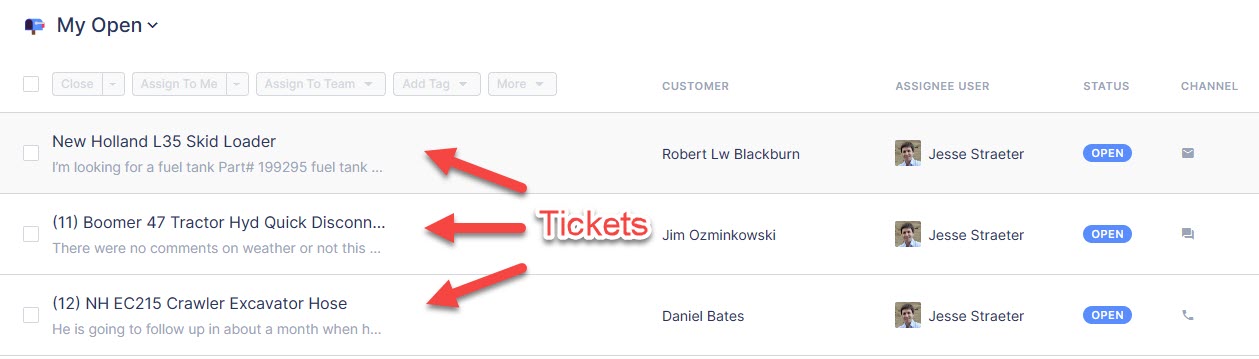
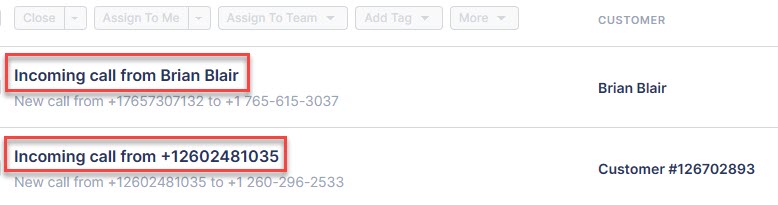
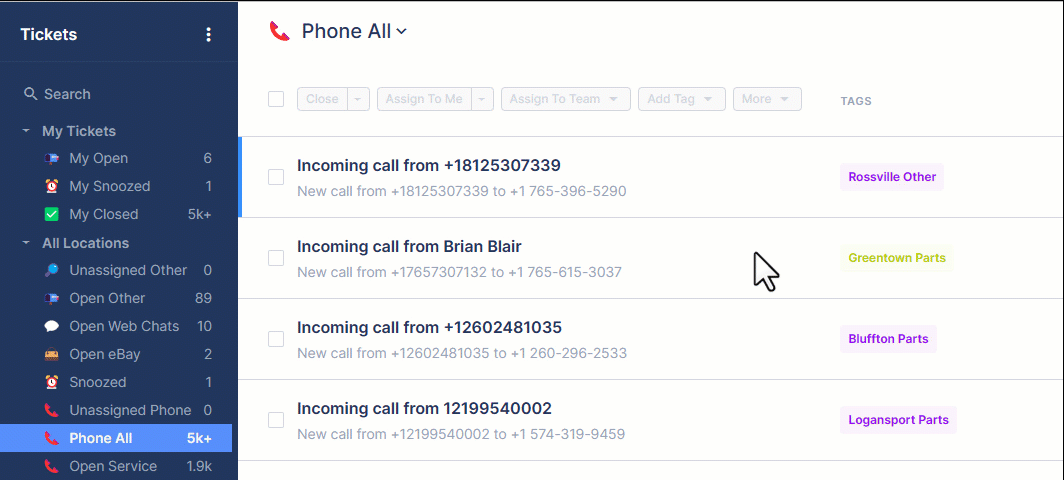
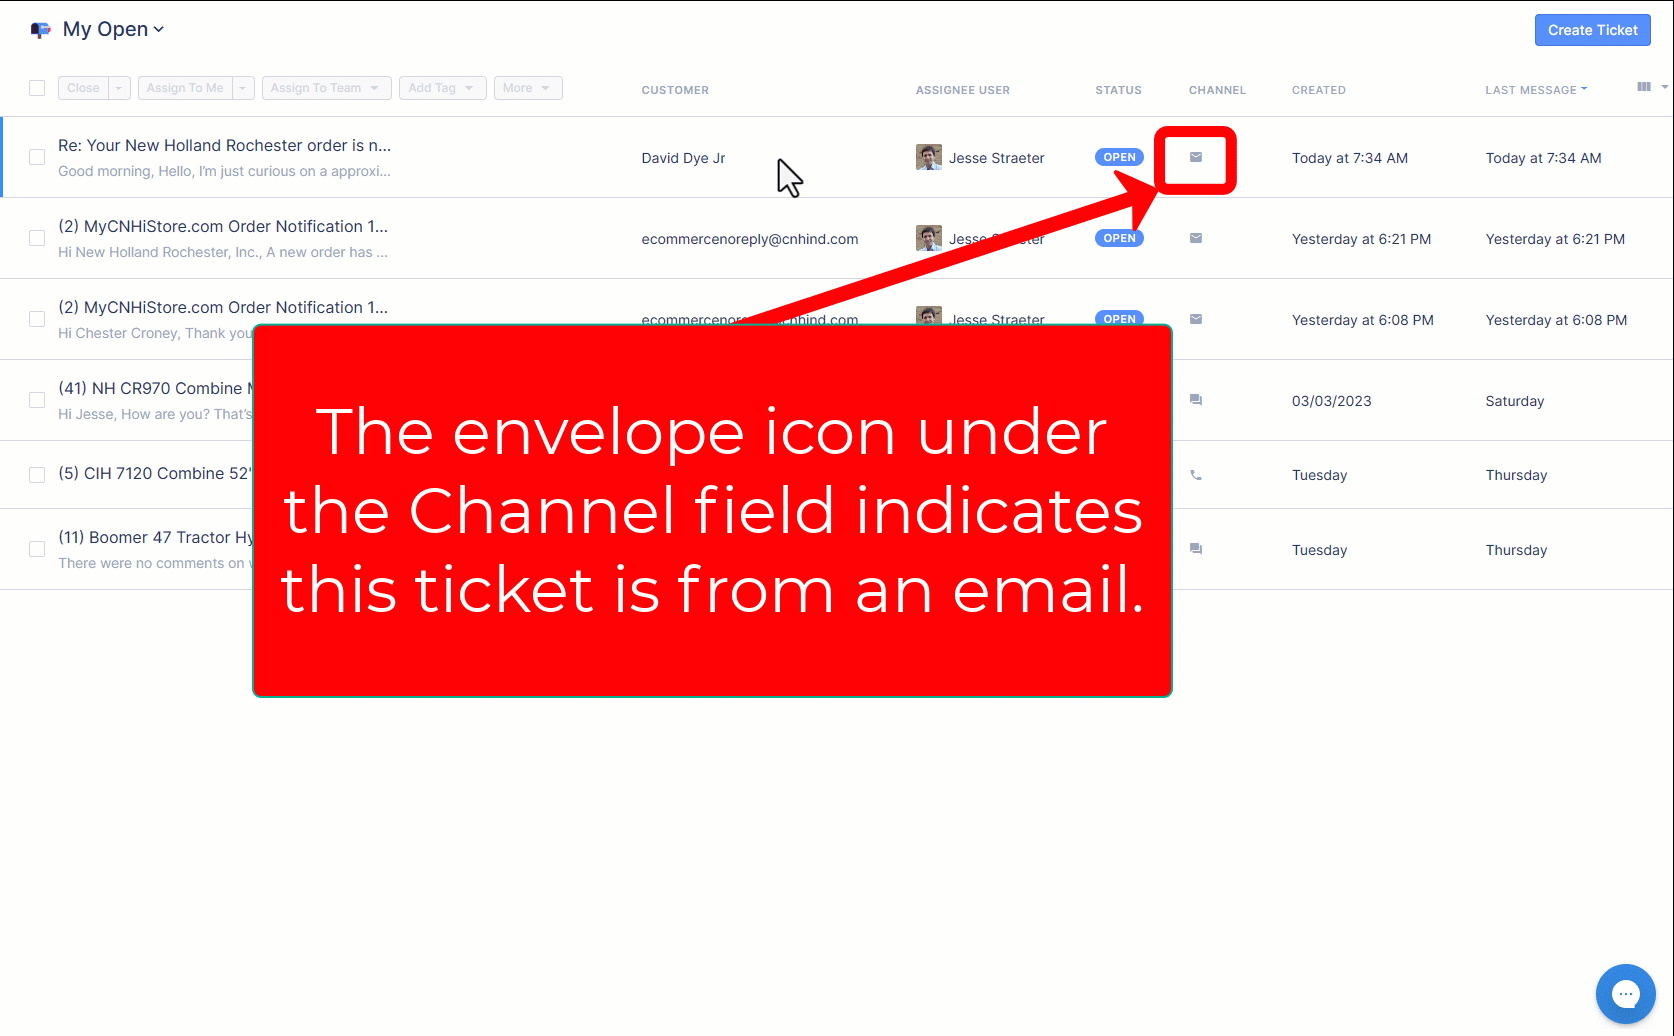
Whenever there is an incoming phone call, text message, website chat, or emails to specific inboxes, a ticket is created in Gorgias to view it:
Within the ticket, you can communicate with the customer, or leave internal notes to communicate with other team members or for your own reference. All of these features are discussed within this guide.
Navigate to https://newhollandrochester.gorgias.com and login to the website using your credentials.
Note: It is important to be logged into Gorgias throughout the day as it is a requirement in order for phone calls to ring to you.

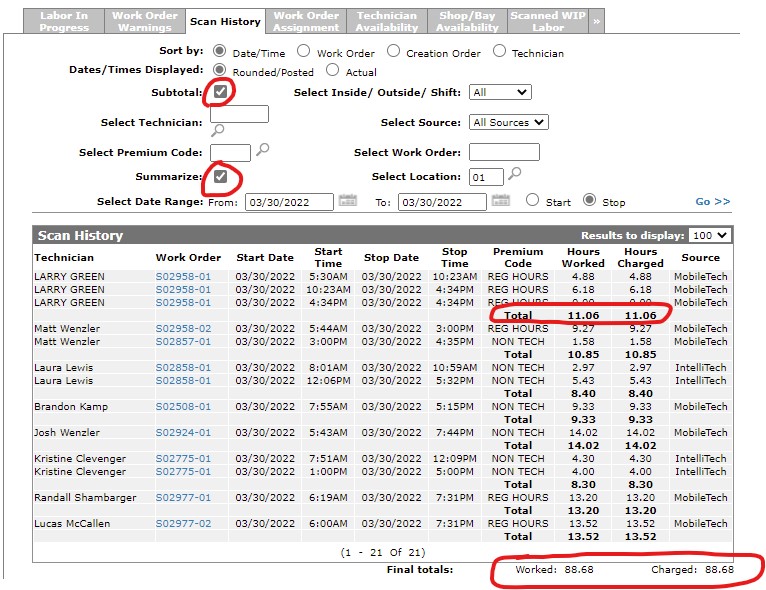
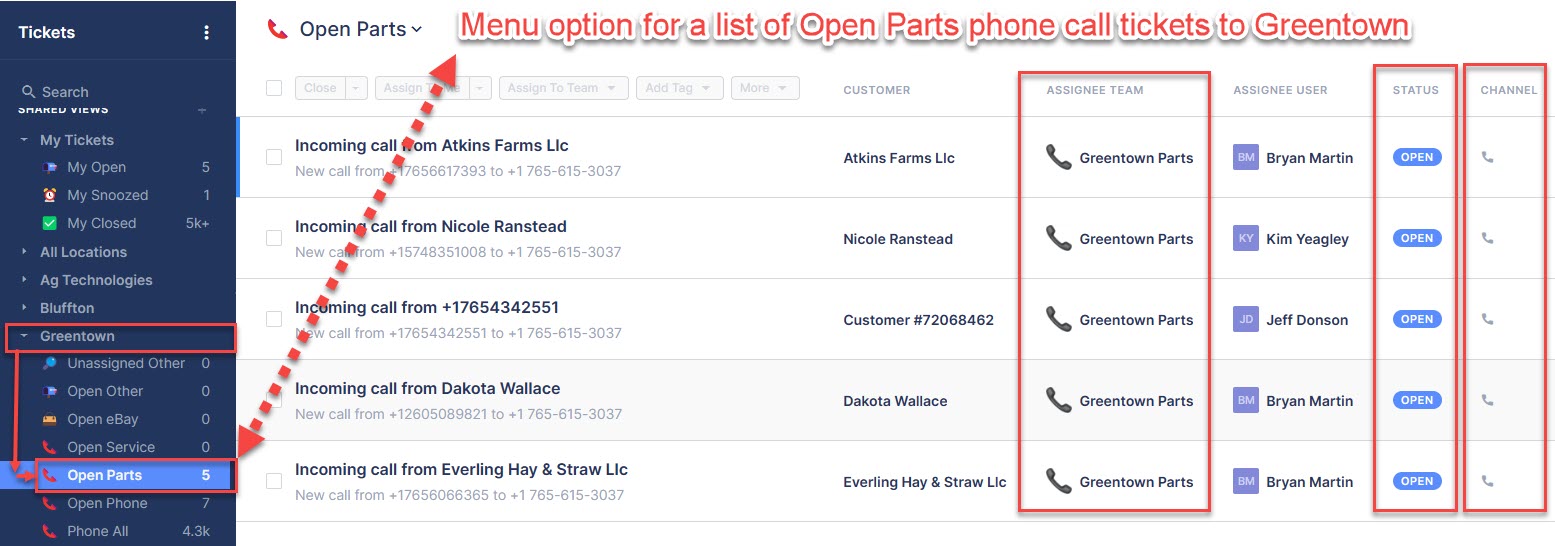
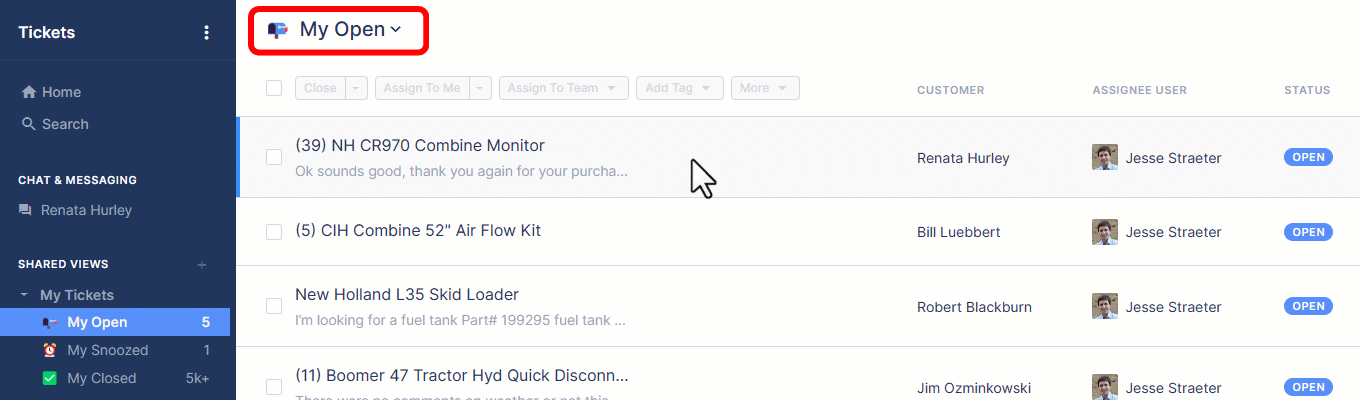
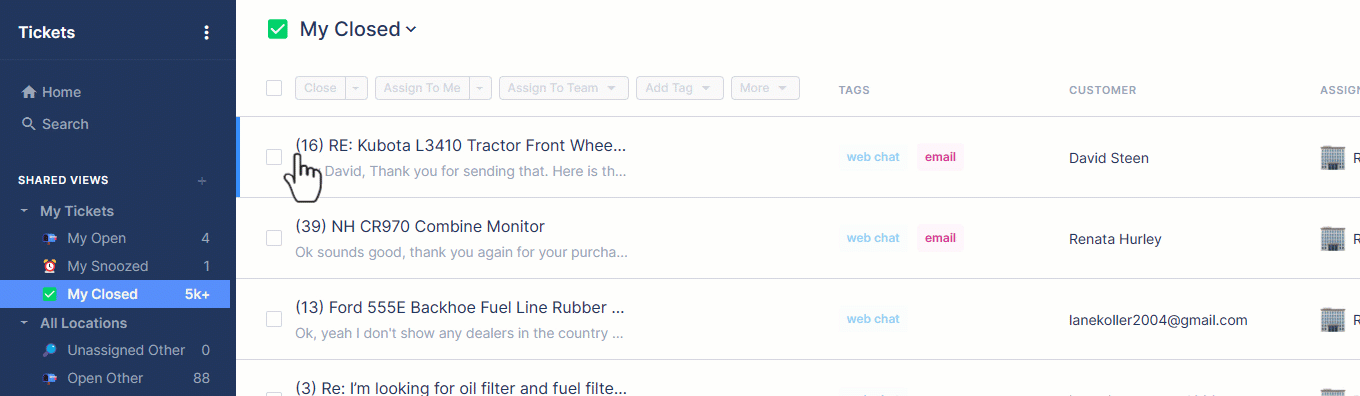
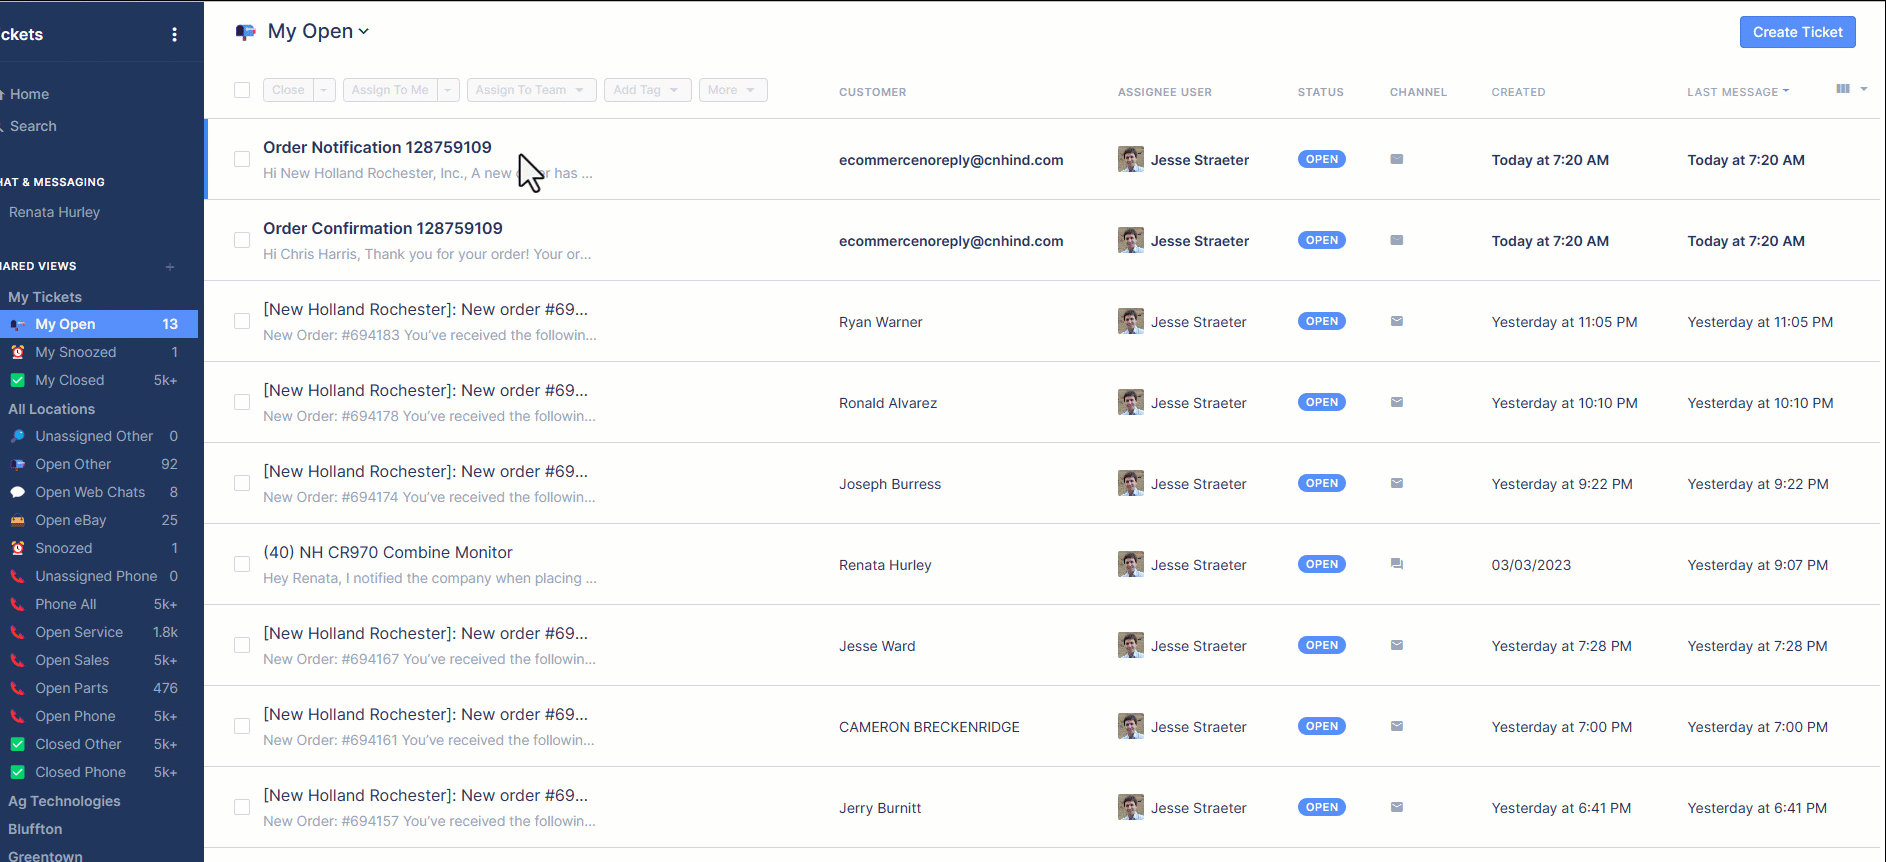
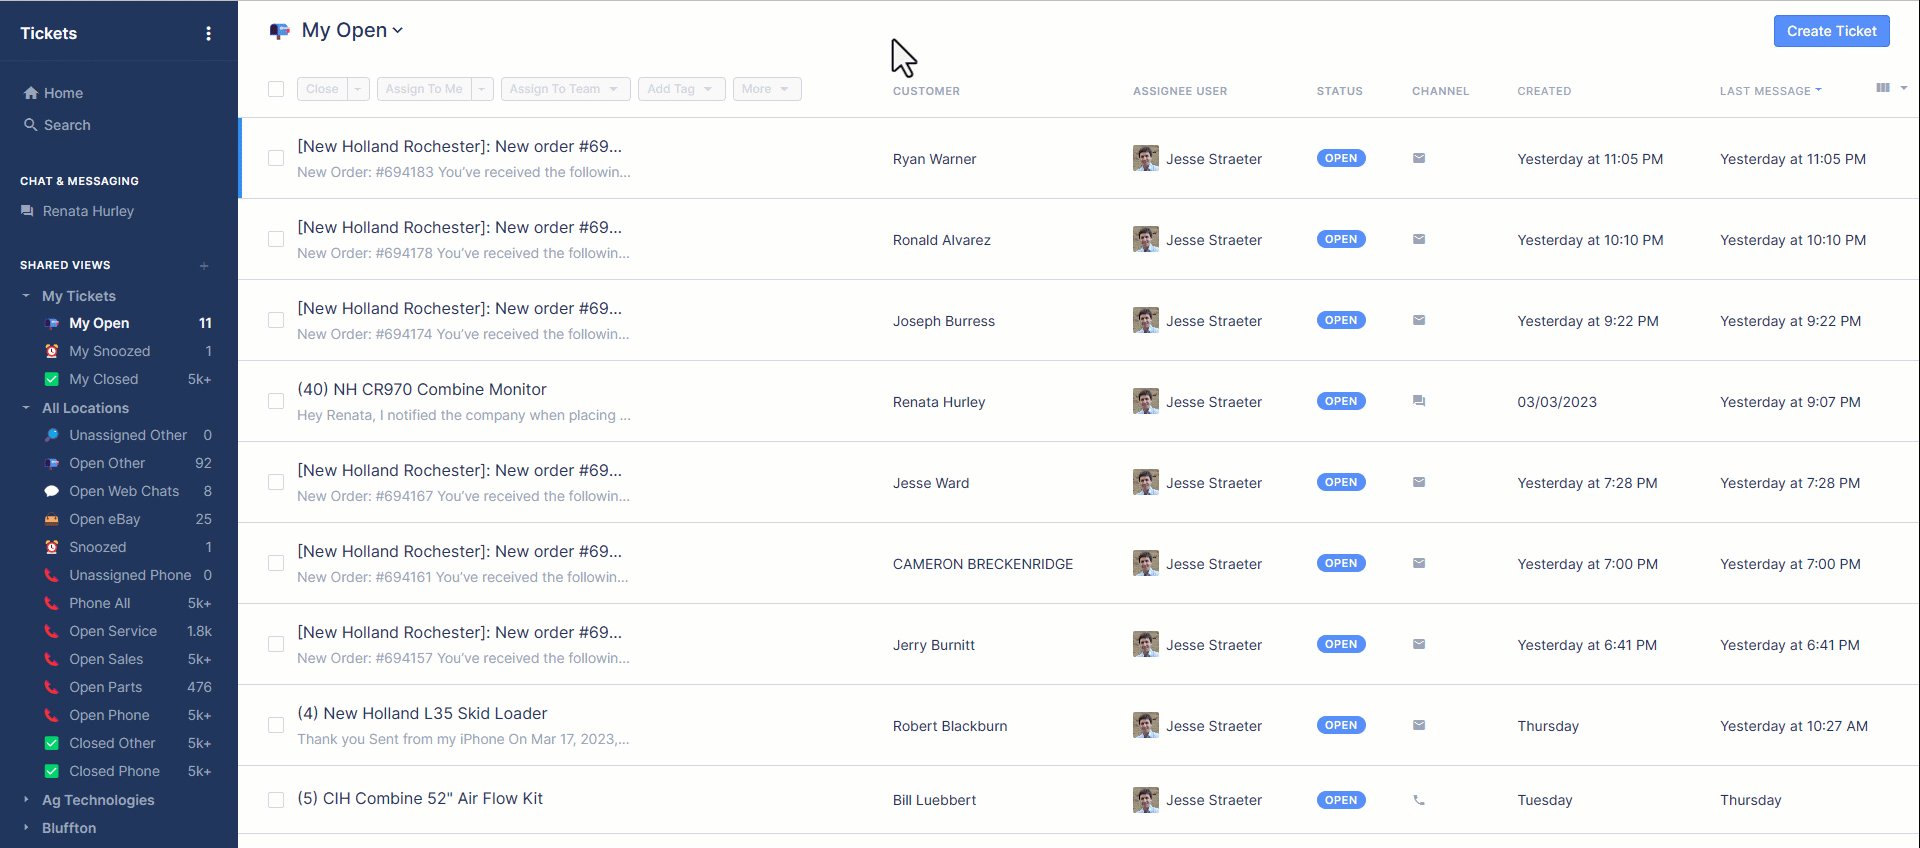
With many tickets being created daily, the left-hand menu bar is useful by grouping tickets to help quickly find tickets relevant to you. By default, when you log in, you will be taken to the My Open ticket menu, which displays all open tickets assigned to you:
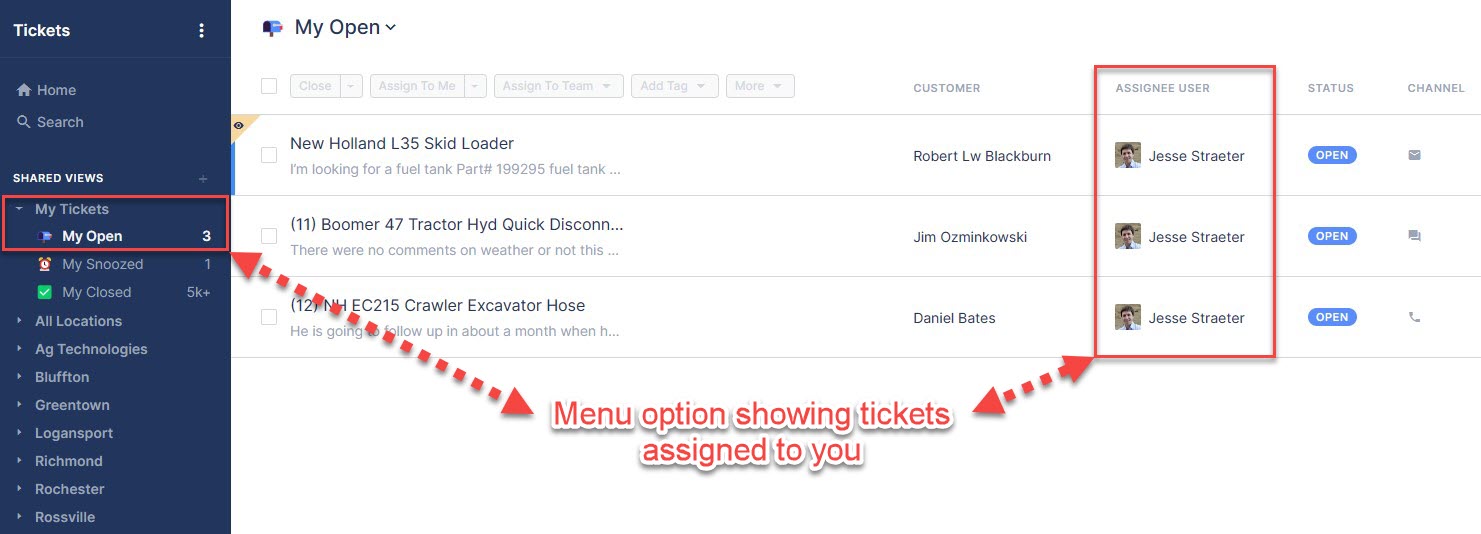
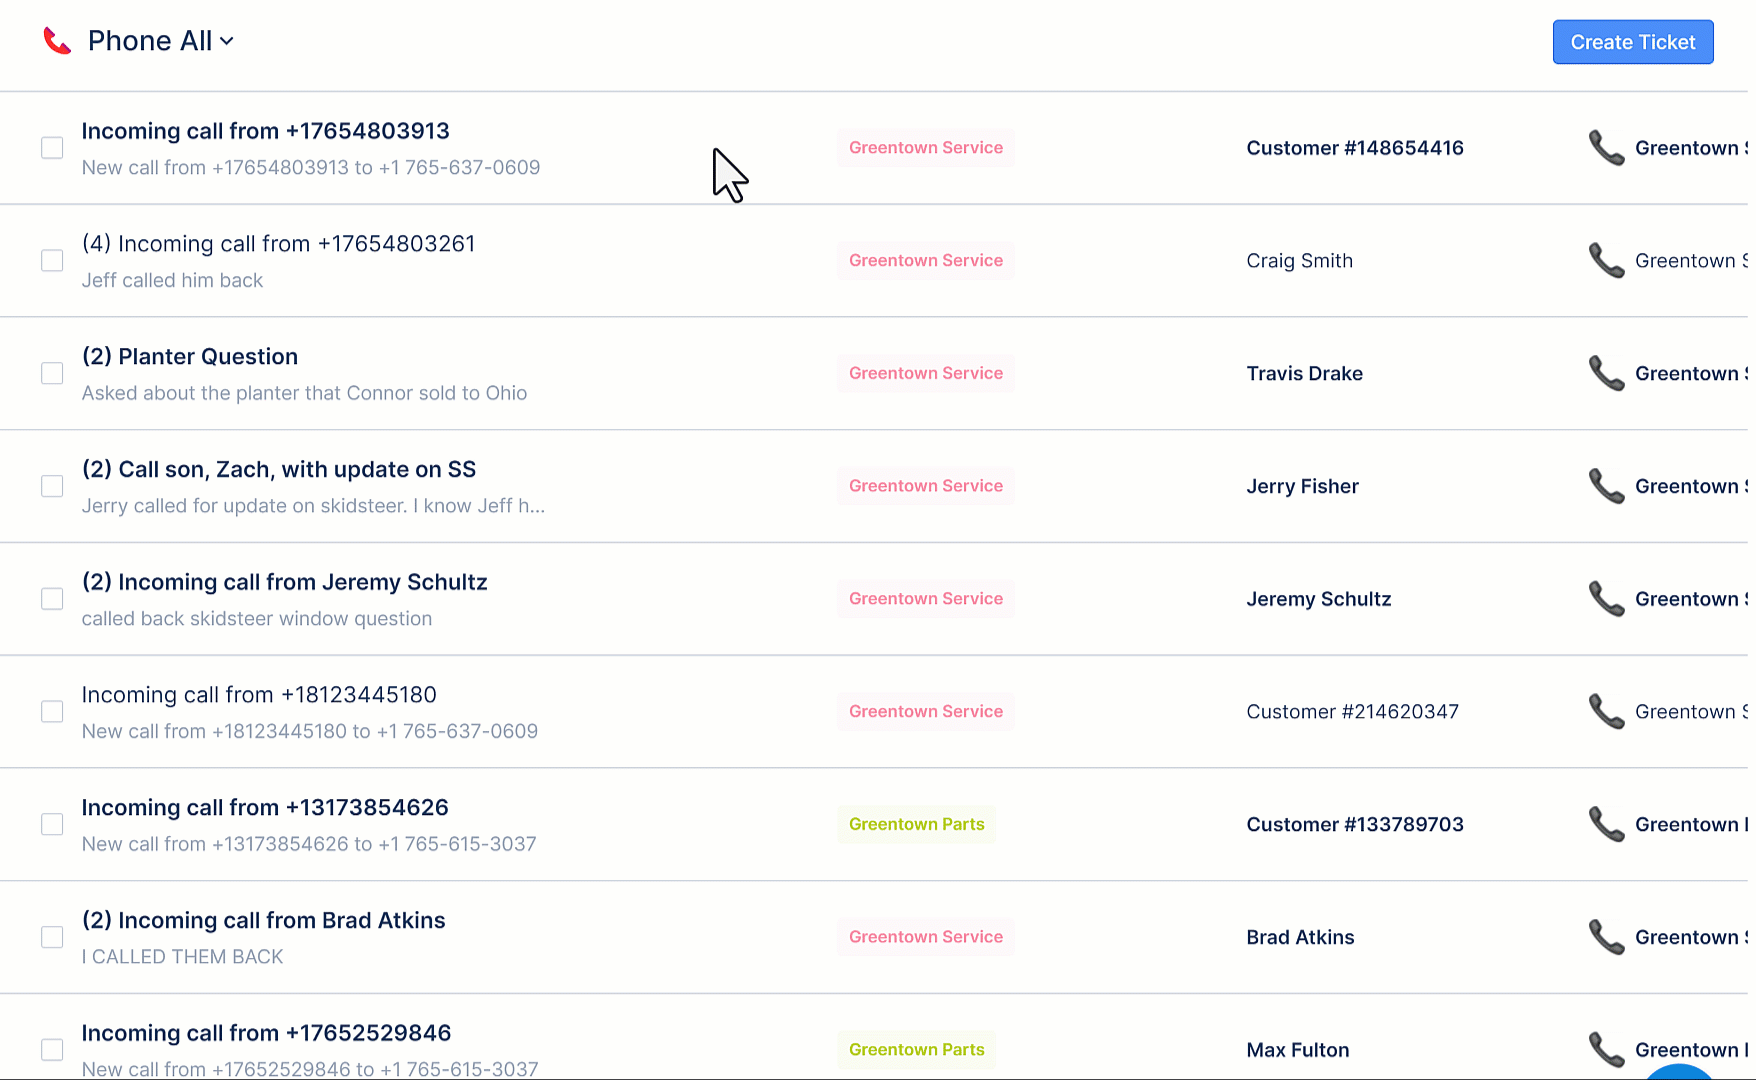
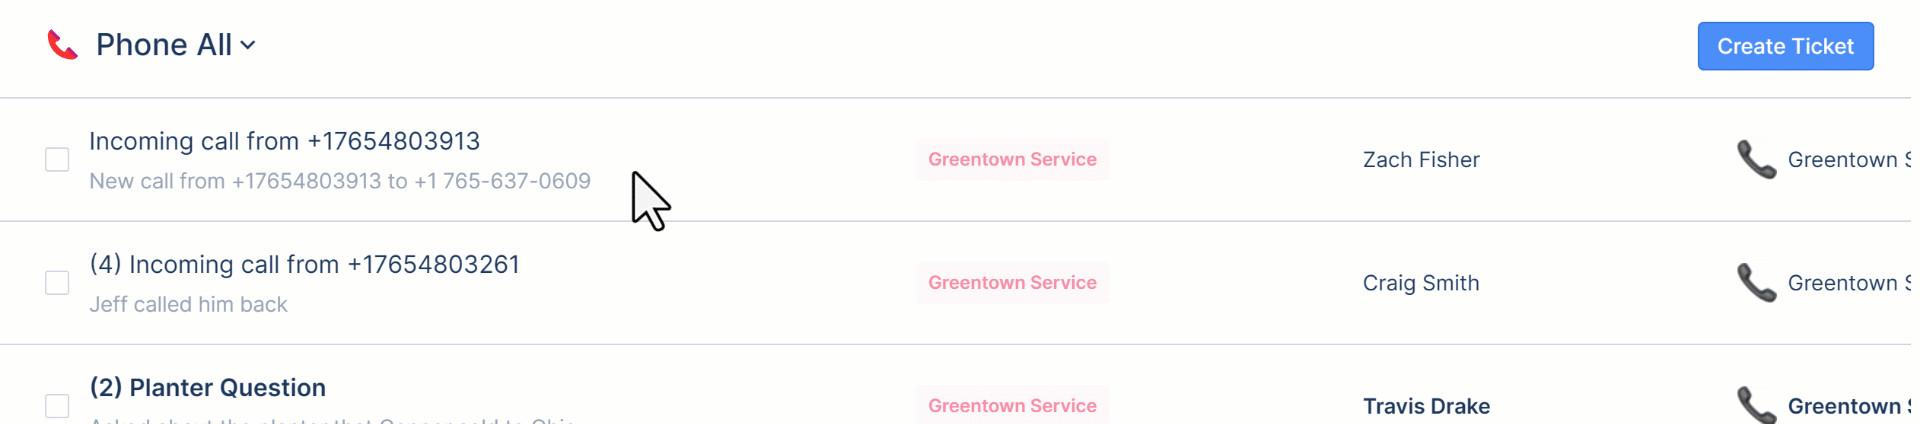
The menu is grouped by primarily by location, with subgroups based on what type of communication channel was used for the ticket (i.e. phone call, non-phone call), and what the status of the tickets are (open or closed). For instance, if I want to look at phone calls that are open at the Greentown store, I can do that by click on the Open Phone subgroup under the Greentown:
Tickets can have one of two Status options, Open or Closed. The status of a ticket is used to help determine whether or not there is still any active communication needed for what that topic is regarding.
There are two ways to close a ticket, the first being from within the ticket itself:
The other method is allows you to close single or multiple tickets from any menu page:
You can similarly open back up any closed ticket by doing the reverse of each of the two methods to close them. From within the ticket itself:
Or from the menu page:
Closing tickets that no longer need attention helps keep focus on tickets that remain open which do require additional attention. If you close out a ticket after responding to a customer and they happen to respond back, the ticket will be automatically reopened if that happens within a short enough of a time frame (typically a few days). Should they respond to the message and it creates a new ticket for that response, you can simply merge the two tickets together (see the Merging Tickets section for more details).
Tickets can be assigned to individual users and/or teams, or neither (unassigned). By assigning a ticket to a specific user and/or team, it helps with the following:
- Indicating to all other users who is currently responsible for that ticket
- Making sure the ticket displays within the appropriate section within the menu
There are a couple of ways to assign tickets to users and/or teams:
- If you are within the ticket, you can click the dropdown menu button for assigning tickets below the ticket title:

- You can also assign tickets to teams and/or users from any of the main menus by selecting the ticket(s) you want to reassign and clicking either of the appropriate buttons located in the top menu bar, and similarly searching and selecting the user/team you want to assign the selected tickets to:
This is a great way to reassign multiple tickets quickly.


By default, tickets are given default title names, such as this:
In order to easier identify what the ticket is regarding, it is a good idea to change the title to help better identify what it is about. To do this, open the ticket and change the title to something more appropriate. Clicking out of the box after entering the new title is all that is needed in order to save it:
Similarly, this helps when viewing any customer's ticket history in order to better help identify which ticket is which:
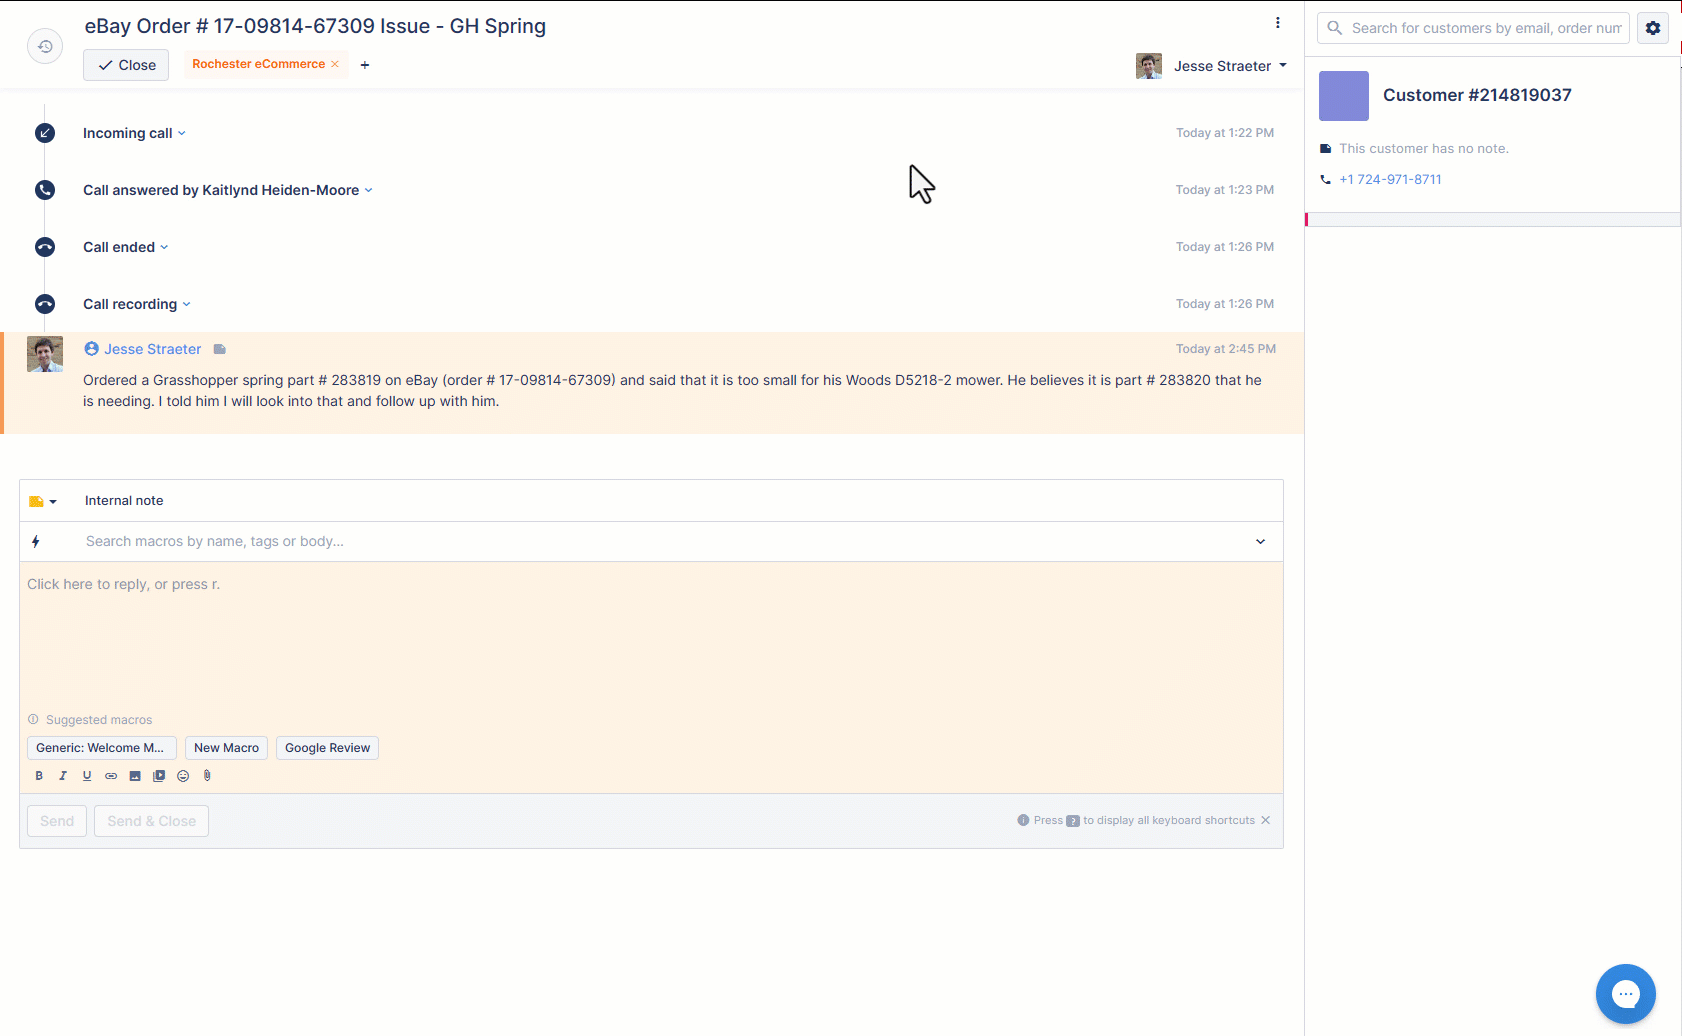
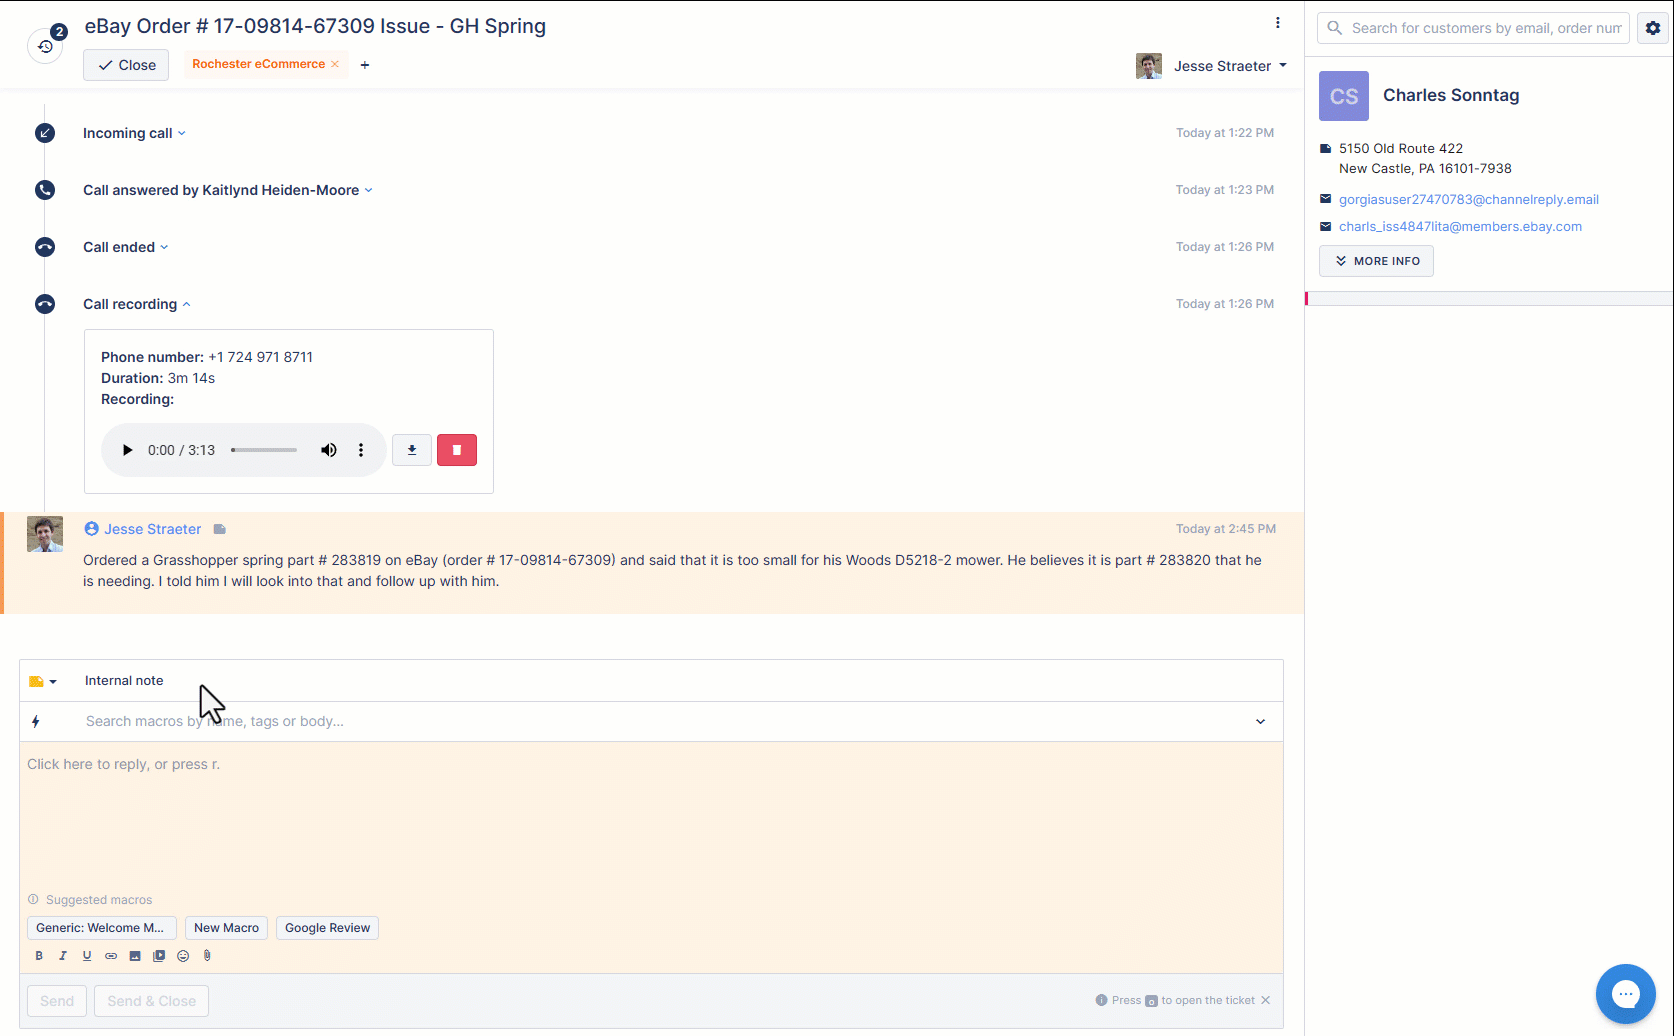
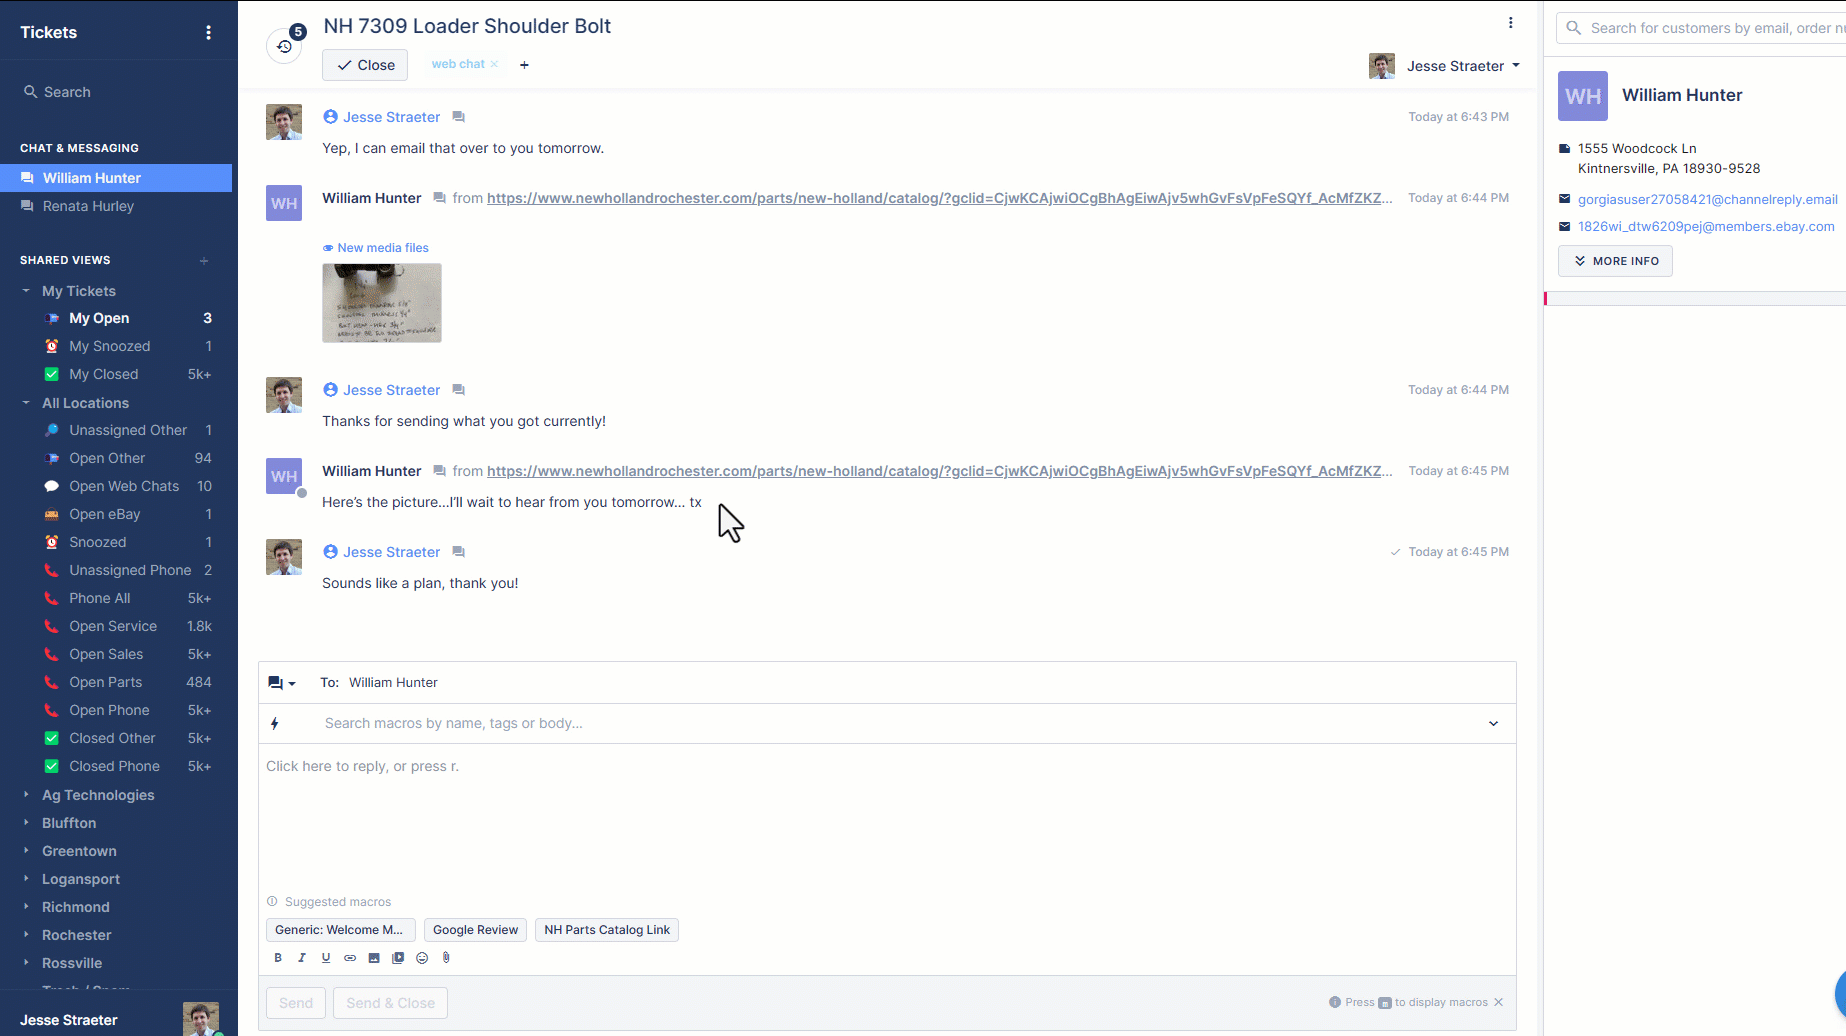
Adding notes to tickets is one of the best ways to utilize Gorgias as it is a great way to keep track of previous conversations with customers:
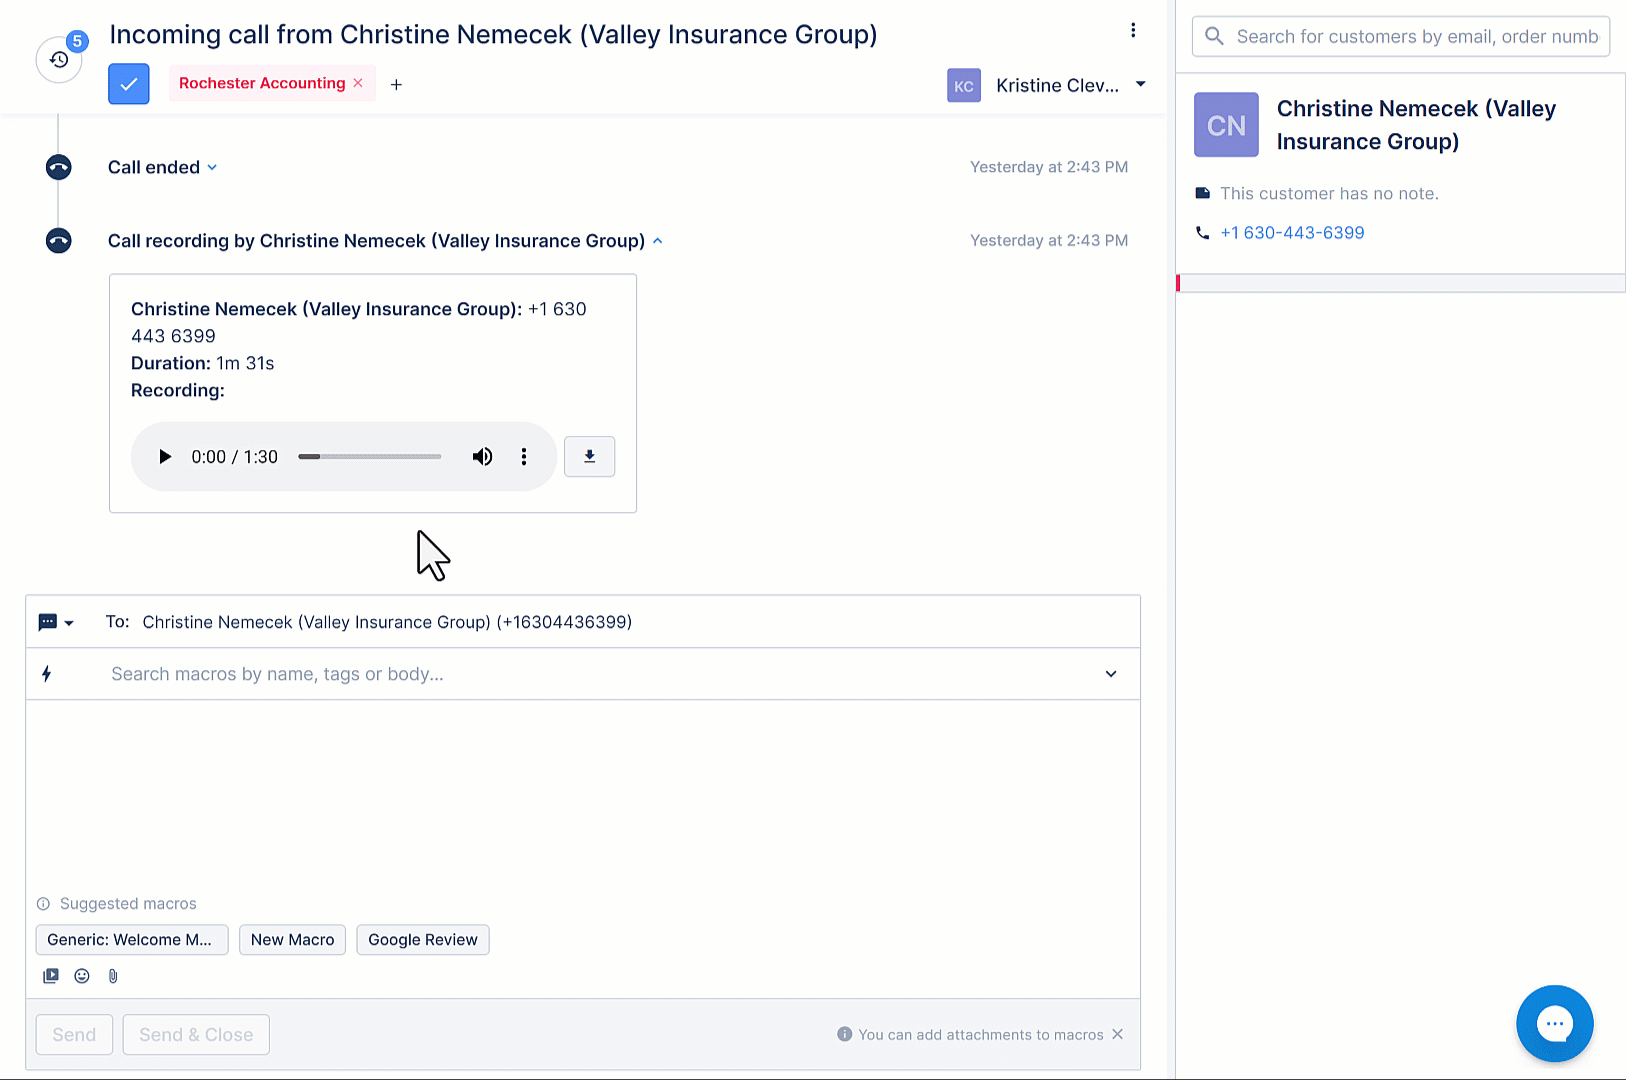
Using the Internal note option from the message box will never be sent to the customer itself, whereas the other options like Send Email or Send SMS will, so you want to make sure that you have the Internal Note option selected when entering a message not intended for the customer. This option turns the message box yellow in order to help indicate that, whereas the other options appear in white.
If you have two tickets that are about the same topic for the same customer, you can merge them together so that all the content about that topic stays grouped together within that ticket. Here is the process on how to do that:
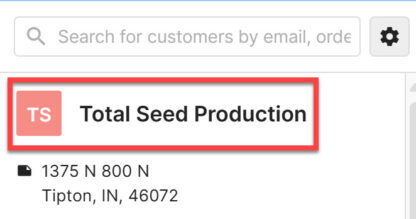
When a new ticket is created for a customer whose name has not been updated in the customer profile, it will assign it a generic customer name by default:

To edit this, click into the ticket and click on the Customer # in the top-right hand side of the ticket window. Then click the Edit Customer button, and update the customer name (and any other details as necessary) from this screen:
You can also add "notes" to the customer profile from within the ticket itself. Most typically, the customer address is best stored here if you have it:
If you need to add a new customer, you can do so by switching to the Customers section, clicking the Add Customer button, and adding the appropriate details as follows:
If you identify two customer profiles that are really the same, you can merge them together, similar to merging tickets. Gorgias will help identify duplicate customer profiles when duplicate information is found (i.e. the same customer name) and suggest merging them. When merging the two profiles together, all the tickets that exist for each customer will be combined into one profile:
You want to be sure that the two profiles are in fact the same person prior to merging them. Just because two customers have the same name, does not automatically mean that they are the same person. Here is another example showing when you may come across duplicate customers when updating customer information and how to go about merging the two:
In order to send text messages / pictures to a customer, that customer needs to have a phone number in their profile that is textable (i.e. cell phone #). Once they do, you can select the Send SMS option from the message box menu, choose which number to send from, and send any message / picture preferred from there. You can only send one picture at a time.
Here is an example of how a conversation may typically go for a customer calling in looking for a part and you want to be certain that you are getting them the right one:
Sending emails to customers in Gorgias is done through the same message box as sending texts and adding Internal Notes:
Gorgias is able to integrate with eBay, allowing us to communicate with customers through eBay directly within Gorgias. There are a couple of items to keep in mind when communicating this way:
- Links do not transfer through to eBay, so you want to be sure to insert the URL address to allow the user to be able to visit any pages such as product pages you want them to visit.
- You do not want to send links to our website through eBay as this is against eBay's policies.
- When sending images, you need to add them as an attachment in Gorgias. If you try to paste them into the message directly, it will not transfer through to eBay.
Here is a video demonstrating these items using an example message in Gorgias:
If you are finished with a ticket for now but want to be reminded to follow up on it at a later time, you can accomplish this in Gorgias by "Snoozing" the ticket. This acts as an alarm clock for the ticket, and is a great way to be reminded to do something at a later, more appropriate time, without having to worry about it until then.
Gorgias and IntelliDealer are now linked through an integration that has been setup. This page explains how the integration works.
The Integration in Action
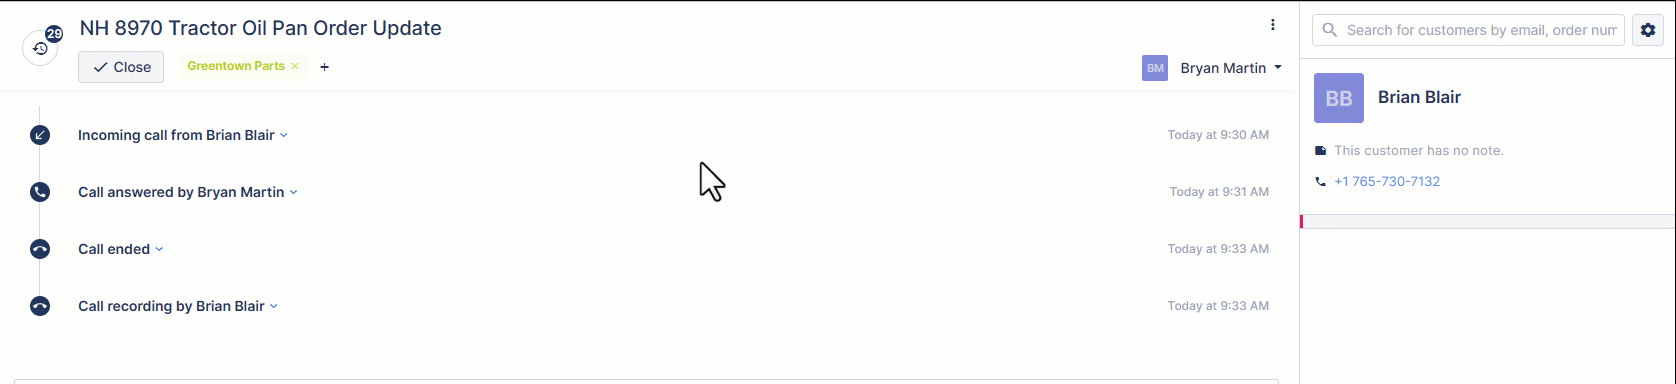
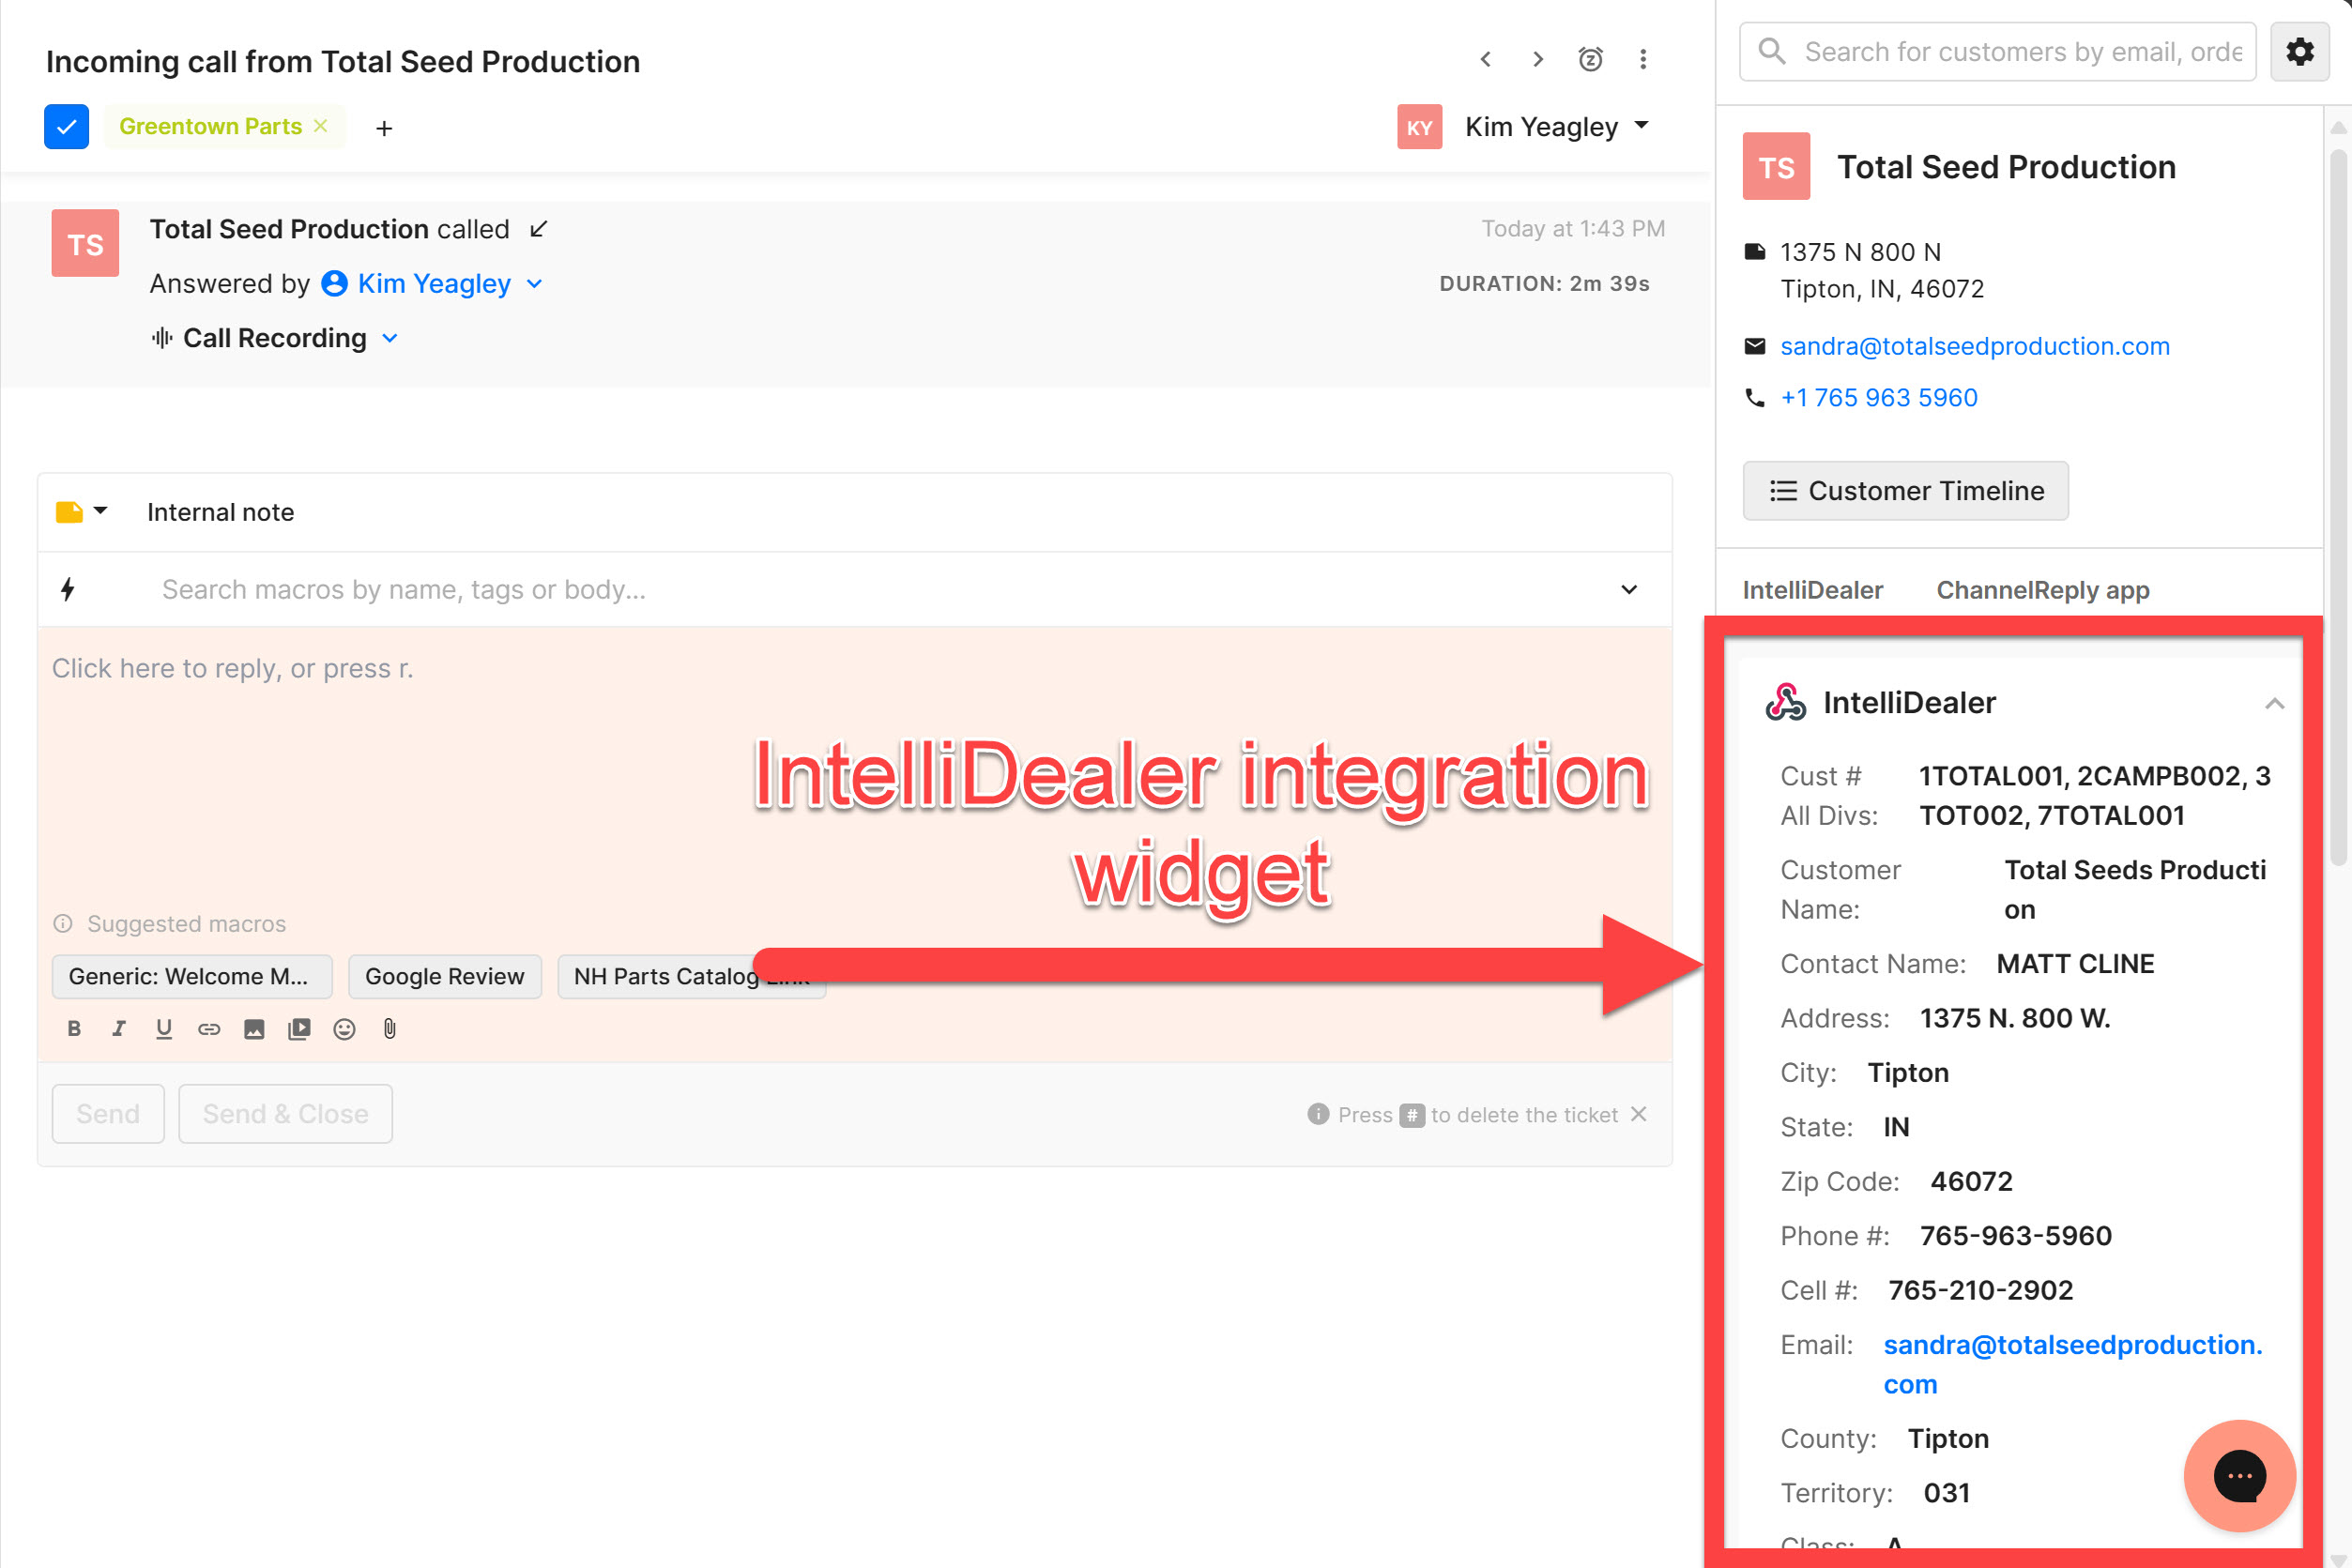
When creating a new ticket, updating a current ticket, or adding a new message to an existing ticket in Gorgias, Gorgias will search for a customer match in IntelliDealer. If a match is found, you will see the customer profile(s) associated with it in the IntelliDealer integration widget on the right-hand side:
The Integration Purpose
This IntelliDealer integration widget will help identify information about the customer using data from IntelliDealer while in Gorgias. For instance, when a phone call comes in, you can open up the new ticket created for that phone call and quickly see at a glance much information about who the customer is, where they are from, and how much dollars worth of business they have done the past few years.
The Integration Data Overview
Much of the values are coming from the Customer Profile screen in Intellidealer as shown here:
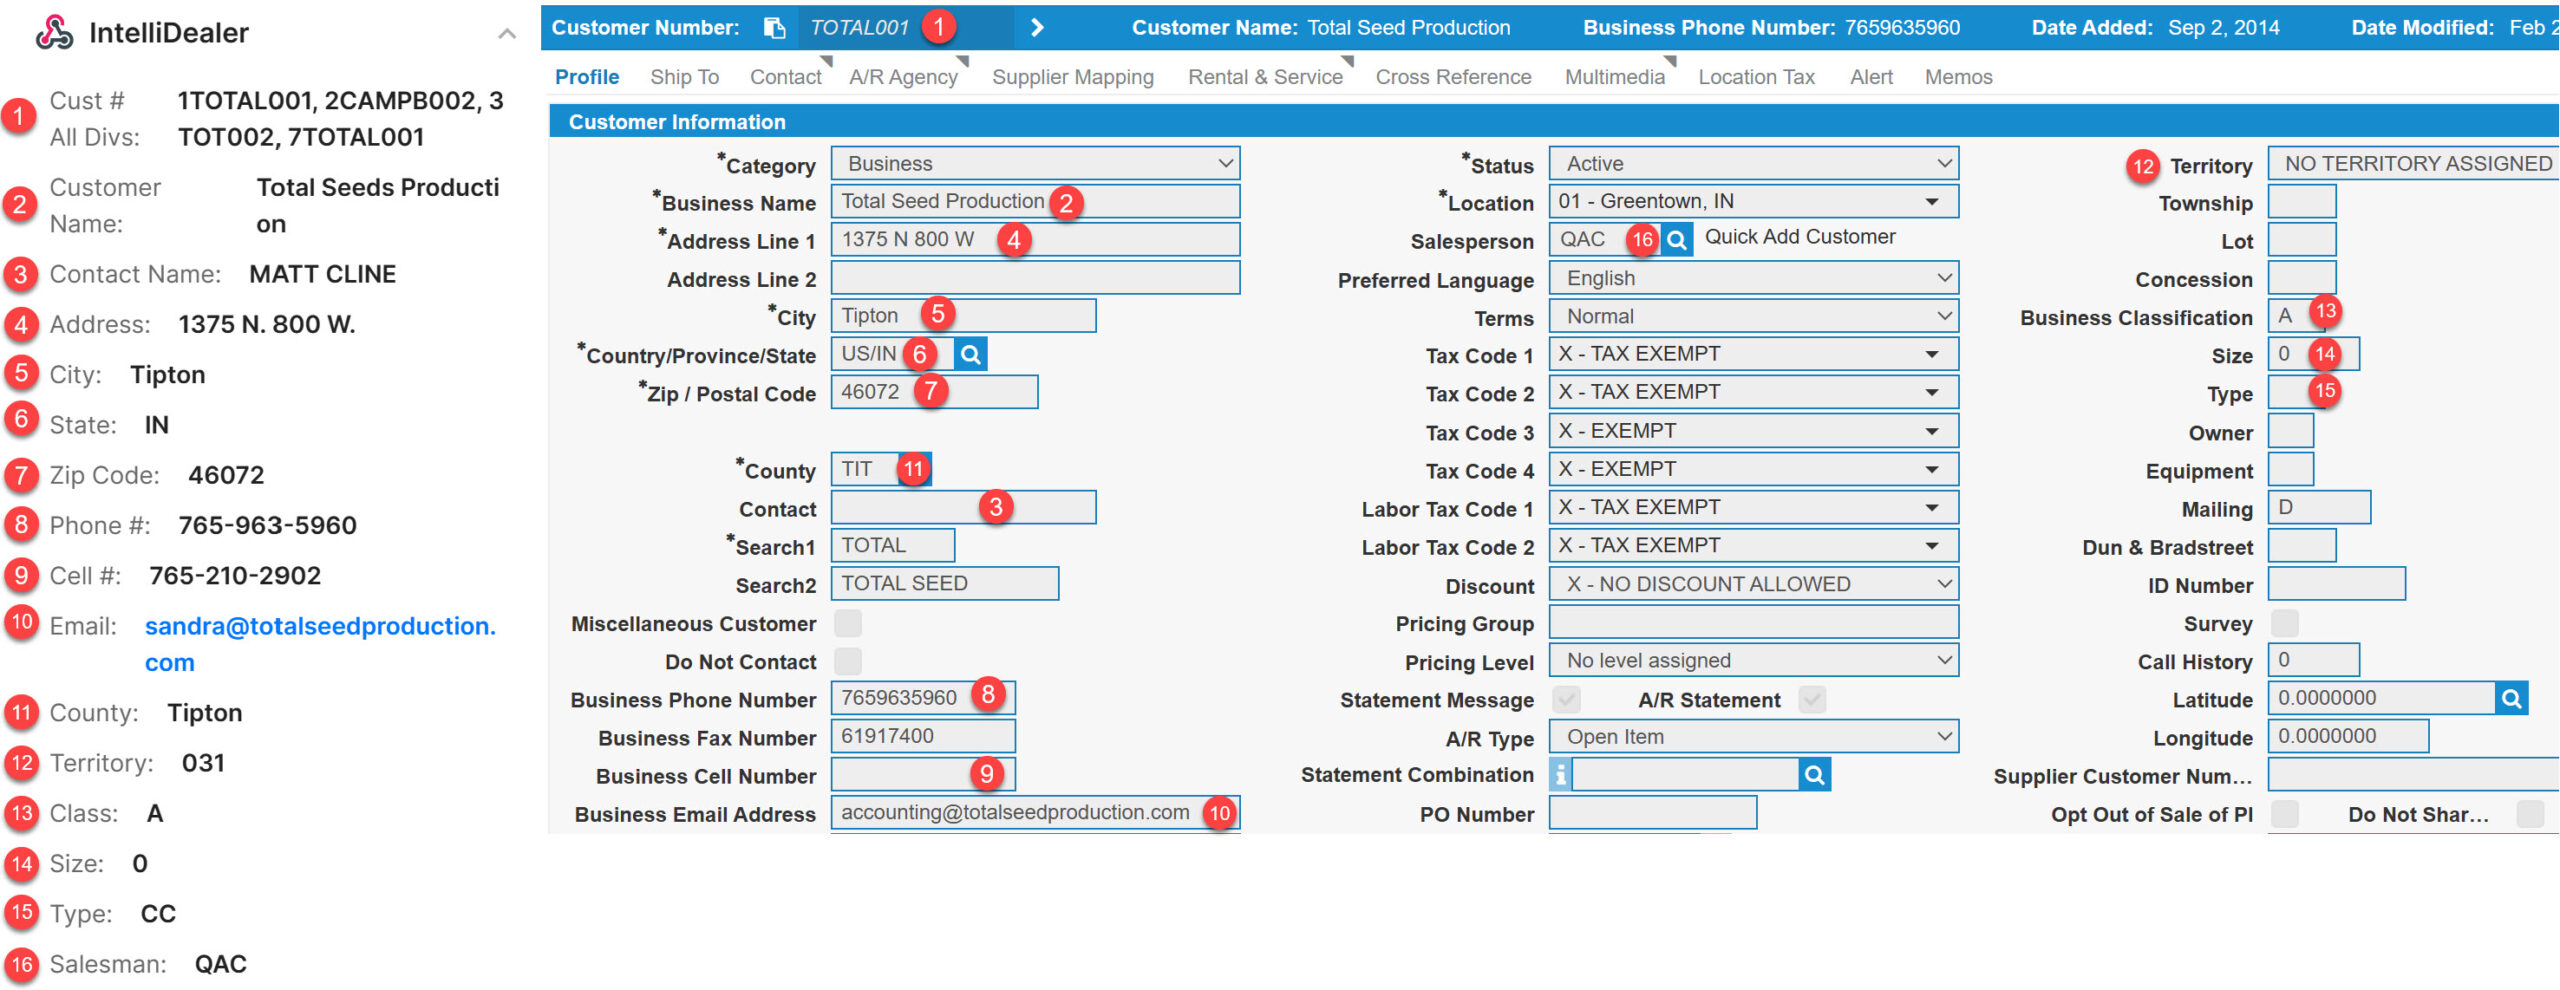
You will notice at times that the data showing in the customer profile screen in Intellidealer does not match the data showing on the Gorgias integration. This may occur when there are multiple customer numbers being combined into the Gorgias integration, as shown in the sample screenshot above. When this happens, the integration uses what is considered to be the "max value" of them. So for instance, if one customer # has a Salesperson of QAC and another customer # has a Saleperson of DWS assigned to it, the integration will consider QAC to be the max value of the two and display that in the Gorgias integration.
Some other noteworthy points on what is displaying in the Gorgias integration fields that may not be immediately clear at first:
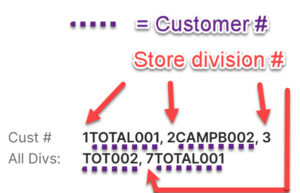
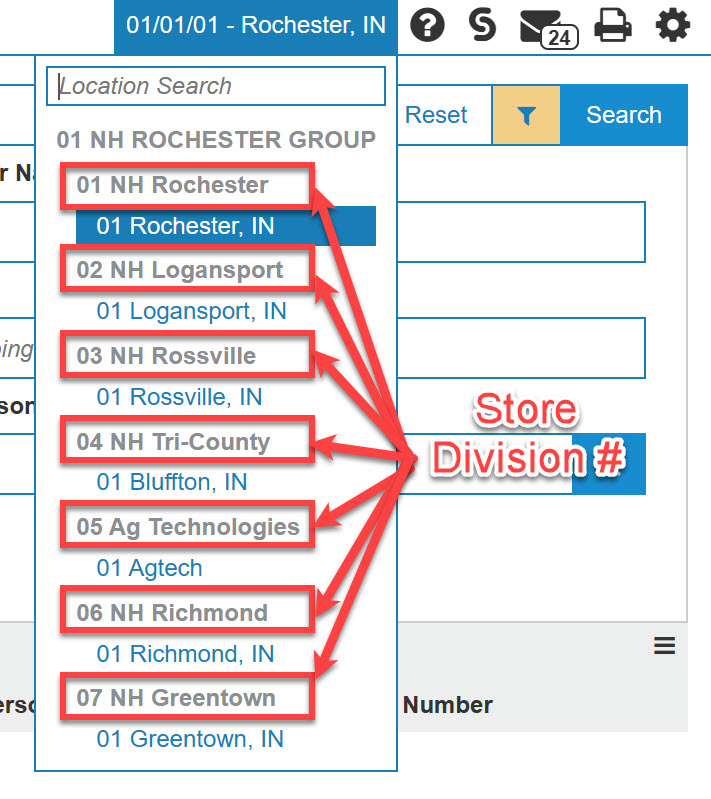
Cust # All Divs: This will list all of the customer numbers that a customer has in Intellidealer. It is listed as the store division # followed by the customer # for that store, as shown here:
Each store's division # can be found in IntelliDealer at the top right-hand part of the screen:
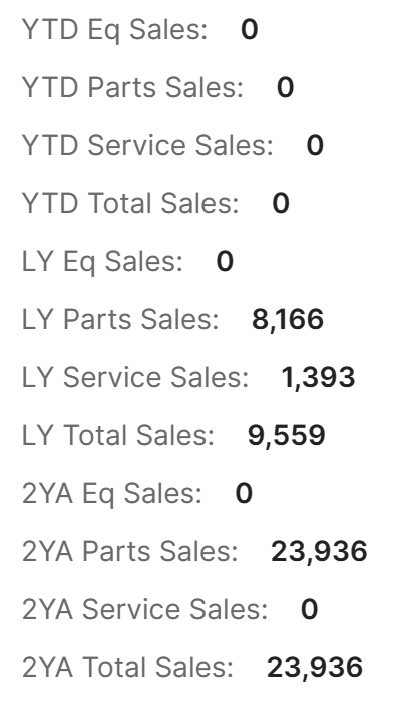
Sales fields: These year-to-date (YTD), last-year (LY), and 2-years-ago (2YA) sales figures for each field are based on the customer profile(s) being used. When there are multiple customer #s being combined, as in the case of the above example, the sales figures for each customer number are all added together.
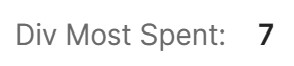
Div Most Spent: This is looking at the location where the customer has spent the most amount of money combined across all departments based on the YTD, LY, and 2YA numbers. The purpose of this is field is simply to help identify which location is the primary location that the customer does business if they have multiple customer numbers being shown in the integration. This may not necessarily always represent where the customer prefers to do business, but can be a helpful indicator nonetheless.
Gorgias ID: This is a unique ID number in Gorgias to identify the customer and is what is used in the customer profile in Intellidealer to link an Intellidealer Customer ID to the Corgias customer ID:

Linking a Customer ID in IntelliDealer to Gorgias Integration
The easiest way to determine this Gorgias ID number for each customer is to first click on the customer name inside of a ticket:
This will pull up the Gorgias customer history screen. You can then see their ID number located in the URL address here:

To link this Gorgias Customer ID to the Intellidealer Customer ID, you need to enter this Gorgias Customer ID # into the Business Fax Number field in their IntelliDealer Customer Profile:

The Gorgias Customer ID and Intellidealer Customer ID are now linked together. You will not immediately see the Intellidealer Customer ID information appear in the Gorgias integration widget, as the Gorgias Intellidealer integration data is only synced on a daily basis.
Training demonstration video overview of Gorgias: